Tuesday, April 26, 2011

DIY Accessories Color Change

The other weekend, Mr C and I went shopping at Yard Sales and Estate Sales.

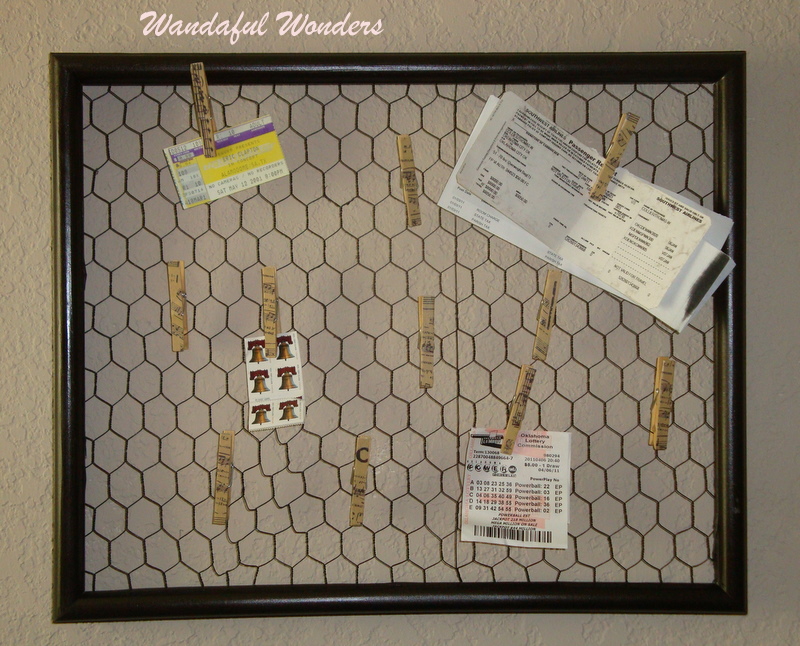
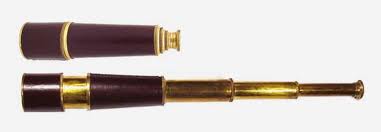
We picked up two small metal decor accessories for $2.00.


These colors were not going to work at my house or my son's house.


So I spray painted, glazed, used Rub 'n Buff, and sprayed a light coat of polyurethane on both accessories.


Here are the results.


I am thinking they can be displayed at Tom's House.  


Also, while shopping, we found a dresser with a mirror, two book cases with removable top shelves, and a couple of more smaller accessories.  I am working on these other items and hope to share with you very soon!


Have a great Week!  Love your comments!  Thank you!


Wanda


Thursday, April 21, 2011

Easter Tablescape

On Tuesday, I went over to my new friend Billie's house.  She has a very beautiful home, and since Easter is this weekend, I wanted to share her dining room tablescape with you.  (The pictures were taken with my Iphone).


It is quite charming.  Here is a close-up of the center piece.

Here is a look at the place setting.


I love the rabbit in the basket napkin ring!


Here is one of the bunnies at the corner of the centerpiece.


The "Frog Rabbit" and goodies will be a gift to the children who live across the street from her.


A Big Thank You to Billie for sharing her tablescape!


Everyone Have a Happy Easter Weekend!!


Wanda

Thursday, April 14, 2011

New/Used Bed Bench

Years ago, Tom, my oldest son, had a bench in his small apartment, which he used as a coffee table. 


He brought it over to my house so I could paint the bench.  After I had lightly sanded the bench and glued four molding pieces to it (to hide the cut out hearts on the legs), I happened to remember that I needed to take photos to share with you.


Here is a look of the top of the bench

Since, the bench is going to be used at the end of his bed, I painted the bench and distressed it with the same colors I used on the headboard (Behr Premium Plus Ultra paint in Powder Snow, Ralph Lauren Tea Stained Glaze, and Minwax Polycrylic Clear Satin)

Here is a look at one of the molding pieces hiding the hearts.


Here is a peek at the lower left corner of the bench


Here is the bench's new look.


Finally, this is how the bench and the headboard looks together.  Drum Roll, Please!


(shadow in the room makes the bench look darker)

I am not finished in this room.  I am currently bleaching Drop Cloths for curtains, and I am cruising new and used sales, Goodwill, Craiglist and other local shops for bedside tables, chairs and accessories that could be worthy of a "THUMBS UP" from Tom.

Hopefully, I will have a complete look for this room, soon.


Enjoy this beautiful spring season!

Wanda

Tuesday, April 12, 2011

Frugal Weekend Project

Over the weekend, I made a simple bulletin board without spending any money. WOO! HOO! Many of you will be familiar with the bulletin board look I chose to make.

I found an empty picture frame in the attic and stapled the chicken wire to the frame and painted it black.

I had leftover scrapbook paper.


I had clothes pins left-over from a project many moons, ago.


I had Mod Podge in the cabinet.

I cut the scrapbook paper into strips to fit the clothes pins.  I used the Mod Podge to attach the strips to the clothes pins.


Here is a close-up of one of the clothes pins after it had dried on the bulletin board.


Here is the completed project hanging above my oldest son's office desk area.

This was a great EASY Frugal Project, which did not take too much time!!

Enjoy your week!  

Wanda

Friday, April 8, 2011

Arrr! R You a Treasure Hunting Pirate?

There are some things that never change through time.  Pirates are known to look for buried treasures.  Back in time, they were searching for Gold and Jewels in buried chests following a map with a huge X.


Today's pirates are looking for buried treasures such as vintage furniture, accessories, beautiful fabrics, dishes, etc.  Currently, pirates' adventures still start with following the treasure map.
 to locate buried treasures in locations such as Multi-Family Garage Sales, Auctions, Goodwill, Habitat for Humanity, and local consignment shops.

Instead of using spy glasses to locate treasures
A chic pirate might wear these instead

to locate treasures on E-bay, Craigslist, or local newspaper advertisements.

I would like to share some of my discovered "buried treasures" at Goodwill from this week


The tray that the treasures are sitting on is  from The "closed" Bombay Store.  The tray  was purchased last Saturday for $3.99. Woo Hoo! (I had removed the price tag)

The small pumpkin had an original price tag of $10.99, and I purchased this jewel for $1.99.


This lovely metal pot (will look great painted) was $3.99.


The large vase will look great cleaned up with some twine wrapped around the neck cost $3.99.


The floor lamp was a steal for $9.99.  I cannot decide if I will paint it white or black.  (If you have any color suggestions, let me know)  I really like the burlap lamp shade with lace over the burlap made by Linda over at Delight.  Maybe, that could be an option for the floor lamp.


These are only a few of the treasures unburied from my adventures.

 I know most of you pirates have found beautiful treasures that caught your eyes and turned your houses into homes.

The best part of the treasure is not the treasure itself, but the memories of the adventure, especially when the discovery is shared with fellow pirates, who are friends and/or family.

ARRR! Enjoy your Treasure Hunts!

Wanda


Wednesday, April 6, 2011

Getting the RED OUT!

Like, I said in the last post.  I have been working on several projects for my oldest son's house.

Back in March, I showed you this red book shelf.


 I have had this shelf since the 1990's.  I used it to display trophies in one of my sons' bedroom.  So, it has been sitting in the attic for quite sometime.

First, I primed this shelf


I applied two coats of Kiltz, painted the shelf with Behr Premium Plus Ultra  Paint in Powdered Snow.  When I distressed the shelf, the red showed and the shelf was UGLY!!

 At the end of the day, I used Jasco Premium Paint & Epoxy Remover and  the electric hand sander to get the RED OUT. 


After all of that work, I re-primed the shelf. Painted the shelf with two coats of Behr Premium Ultra in Powdered Snow.  I distressed the shelf and used Ralph Lauren Tea Stain Glaze and placed two coats of Minwax Polycrylic Clear Satin. (I like how Minwax Polycrylic cleans up with soap and water)

Here is a peek at the shelf top corner.


and a quick peek at one of the shelf's support brace


No Way after stipping and sanding was I painting the bottom of the shelf :)

Here is the finished shelf hanging in Tom's Laundry Room.


What do you think? 

If you have any easier ways to get the RED OUT, please share!

Have a great day!  

Wanda


Sunday, April 3, 2011

Is it a Door or a HeadBoard?

I have been working on a couple of projects for my oldest son's house.  How did I get permission to work on any projects for his home?  I did like all good moms do... I said PLEASE and kindly asked, "Is it Okay if I...?  Only after I hear a " yes", do I go forward with any projects.

First, I want to give a Shout Out to my neighbor (right across the street), Allison.  She has  "Refunk my Junk" located at http://www.refunkmyjunk.blogspot.com/.  Please check out her blog.  She has a gifted talent of painting furniture and a great interior design eye.  Allison encouraged me to download the ebooks available by Colby and Mandie Morris.  Most of you will be familiar with their blog Altar'd located at http://www.altard.com/. I purchased both ebooks and used all of their suggestions in products.

The first project began when Mr C and I went to Habitat for Humanity in downtown Oklahoma City. We purchased an old wooden door for $25.00.  Mr C. measured twice and cut once the door to fit as a headboard for our son's bedroom.

Here is a picture of the door after it had been cut and the empty door knob area  filled with wood filler..

We went to Home Depot and found baseboard to use as molding for the top of the headboard.  Mr. C. used the miter box to cut the sides of the molding.  We used wood glue and staples to attach the molding to the door.

After the molding was attached, I used wood filler to fill the molding corners.  I lightly sanded the door and primed it with Kiltz.  After the Kiltz, I applied two coats of Behr Premium Plus Ultra paint in Powdered Snow. 


.  After the paint had dried, I distressed the door using the electric sander

and "Old School" sanding method

I applied Ralph Lauren Tea Stained Glaze to the distressed door and two coats of Minwax Polycrylic Clear Satin.

Here is a close-up photo of the headboard.


Here is the finish project hanging in Tom's room.

Guess who loves the headboard the best?


Jack! (Tom's Dog)  He LOVES the HeadBoard!!!

Thank you for stopping by! I love to read all of your comments!

Have a Great Week!

Wanda