Showing posts with label DIY. Show all posts

Friday, August 7, 2015

Upholstery Chair

Hi Everyone!

I missed blogging and sharing my adventures! SO,  I AM BACK!


On August 17th, I am going to start a second upholstery class with my friend, Carla Holley.  We took our first class last summer at Yukon Oklahoma  Campus of  the Canadian Valley Techology School.  It was a one month class and quite fast paced. The class is so popular! We had no idea it would take over a year before there would be space for us in the class!   

So, I want to share my experience of one of my upholstery projects from our class, last summer.

On the first evening of the class, we had to learn how to prepare the upholstery sewing machine, sew a pillow with cording, and receive permission on our projects from the instructor.  The instructor gave me a thumbs up to work on a chair.

Here is a before-photo of the poor pitiful chair.  Diablo, our cat, loved digging his claws into it!  I had shared a different photo of this chair, when I was trying out Lets Chip It by Sherwin Williams.  (BTW: All the photos were taken with my iPhone, so, you are welcome to roll your eyes at the quality of the photos.)


The first step is to strip the chair of cording and material.  FYI: it took me forever to remove all the staples out of the chair without damaging the wood!!   (Carla and I quickly learned... the secret to the class ...before, the first day of class have your project stripped and ready to cover.)


Most novices would probably choose a solid material or a print that does not have to be aligned like a stripe print, however NO Way Not ME!


 I chose a  STRIPED MATERIAL!  The top and bottom cushion stripes must be aligned with each other! (Thank goodness for the instructor's help!)

The original cording on the chair must be measured and a new cording had to be sewn to go on the chair.  A great reference for instruction of cutting bias cording is offered by the Cooperative Extension Service, University of Kentucky - College of Agriculture.  (Since, I am originally from Kentucky, I just had to use this source. You can always google, "cutting bias cording" for other sources.)


The next step is to use the old material as a pattern and cut the new batting and material for the chair.


Then, the Work of  centering the material to wrap, pulling HARD on the material, and stapling the material to the wood chair back and wood chair seat.  (NO JOKE, about PULLING,  the material should be TAUT!)  My hands were sore from pulling!

After all the work, I had a cushion ready to install (screw) on to the chair.


After the cording was stapled to the bottom and top of the chair and the extra material of the cording trimmed away.  I took this photo of my project!


Here is the chair sitting in the bedroom.


I am Happy with the results and I am looking forward to my second class this month!  I think I am going to tackle the two wing backed chairs in the next class, if the instructor gives me the thumbs UP!

How was your first experience reupholstering furniture?  Please share! 

Wishing you a great weekend!


Wanda


Thursday, August 16, 2012

Lets Chip It, Baby!

Hello Folks!

I hope you are having a great week!  I went to my aquatic aerobic class this morning and finished little odds-and-ins that needed to be taken care of like return phone calls, filing, and working on my “To Do” list.

Now, to what I have wanted to do for quite a while!  Since, Sophie, our exchange student, went home in June, it is time to tranform her bedroom back into a guest bedroom.  I do not want to go back to the "Grandma's Bedroom Room Look" in the guest bedroom. (even if I am ENVIOUS of all my friends who are Grandmas, now!)

Back in June, I purchased this striped quit to use in the room at TJ Maxx. The colors are totally different from the red and brown room I used before Sophie and the purple, teal and brown used during Sophie visit.

Quilt

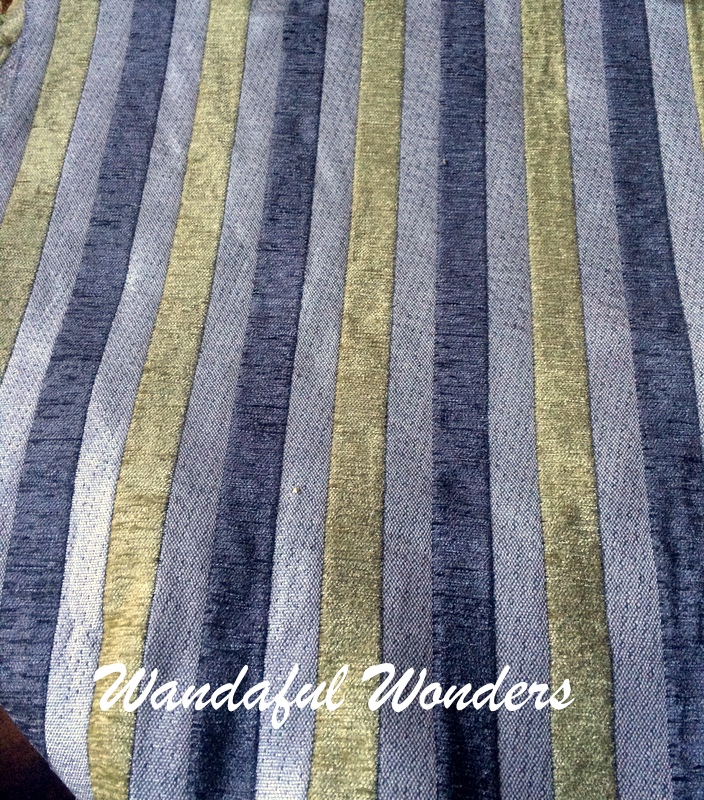
A couple of days later, I managed to go to a local fabric store and found this material to go with the quilt.

DSC_0585
 
This material just cried out for me to take it home. I loved the graphic design print and the colors!  I thought with the curtains made in this print or at least trimmed in this print with a couple of accent pillows (also, made out of the same print) on the bed and the chair, the room (with the right paint color on the walls) just might pull together for a new contemporary lighter look.

Now, here it is August and I need to get moving on this room.  I thought about painting the bed, dresser, and chest-a-drawers.  Mr. C did not like that idea and I agree I can always go back and paint furniture. However, I do have this gold chair, I can paint and try my hand at upholstering. You can see where Diablo, the cat, has used the chair as a scratching board!  BAD CAT!

Gold Chair

For those people who know me well, don’t you dare laugh at me for even thinking about upholstering this chair!  If I can try to do it! YOU CAN TOO!

Everyone has been going to Lets Chip it by Sherwin Williams, so I did.  I love it!  You just up load your photo and "Lets Chip It" will give several choices of paint to choose from and you can save it to your computer.

Here is what "Lets Chip It" offered on the quilt photo.

bedrm quilt chip1


Then I laid the curtain material swatch on top of the quilt. Here are the choices "Lets Chip IT" gave for quilt and the curtain swatch, together.

 q cs 02

I am Very Excited over this tool, Lets Chip It by Sherwin Williams!  Try it!  I think you will love it too!  It has given me several choices that I can paint on the walls and consider for the chair. Plus, you can chip colors from your kids art.  NOW, I need to shop for a coordinating fabric for the chair!

Are you getting ready to redo a room?  Paint the walls? Paint the furniture? Pick out new fabric or flooring?  It takes time and imagination to pull a room together.  Honestly, I do not think any of my rooms are pulled together.  Sometimes, I think I have too many different looks in one room (like a person's short attention span).
  
Which is me!

Wishing you a blessed week!  

Thank you for following my adventures! All of your comments on Face Book and on my blog means so much to me!  

Wanda

Thursday, July 21, 2011

Wanted: Teenage Bedroom not Grandma's Bedroom!!

Last week, We received a letter from Education Foundation (EF) announcing that Sophie, our exchange student, will be here on August 11th.  We had her mother, Jennifer, live with us for a full school year back in 1989-1990.  Now we are blessed to have Sophie come live with us!


Yes, we are very excited!  I need to get busy and get the bedroom ready for Sophie to decorate.

Here are a couple of photos of the room where she will sleep. (please note these photos were taken before I started a blog...nor have I  improved much with my photo taking and photo editing...LOL!)


This room needs HELP!  A ROOM MAKE-OVER is needed so a TEENAGER can live in this room!!! 

I am going to take everything down except the mirror off the wall, so she can decorate.  The red comforter set is going to be donated. I am replacing the red curtains and red table skirt with something to match the bedding.  I am loving lamp drum shades, so I have started my hunt for drum shades to fit the light sconces by the bed. (In fact, I think the light sconces should be painted silver or ORB)  What color do you think I should paint the light sconces?

I have this neat leopard print chair in the corner.  I think it is a keeper, beside all young ladies need a chair to drape their clothes on.


I already have my inspiration bedding selected.  Sophie has already noted she "like it" on face book. So, I am going to share with you a sneak peak.


BIG DIFFERENCE!!  Don't you think?  I like all the colors in this bedding and it goes with the brown ceiling and walls.

I am going to go to "Pinterest" and get started with selecting accessories I like for her room and bathroom.  Watch for my selections on "Pinterest".  

I am on countdown time before Sophie arrives!

Thank you for following my adventures!  I love all your comments!

Wanda


Tuesday, July 12, 2011

A Sketchbook of Birds by Charles Tunnicliffe

I have been wanting to switch out several prints in my house to frame sketches of birds.  I have noticed the price of several of the framed bird sketches and re-prints.  


Then, I thought maybe an option for me would be to find prints in books and have them matted and framed at Michaels or Hobby Lobby.  At least, I could purchase the mats and frames and complete a DIY project with framed bird sketches.  So, I headed over to the used bookstore, "Archives Books".  


I found the most interesting book.


for a great price of $4.95


I loved the sketches inside this book by Charles Tunnicliffe. The book is "Divided into five sections - Seabirds; Waders; Geese, Ducks, and Swans"; including  Birds of Prey; and Miscellaneous Birds.  The drawings were selected from seventeen of the artist's sketchbooks.  "C. F. Tunnicliffe was born in Cheshire, England in 1901."  Tunnicliffe usually noted on his sketches the location and the date of composition.


Mr. Tunnicliffe died before the publication of this book, "...but he did see color proofs of some of the pictures and took pleasure in discussing and corresponding about publishing details during the planning stages."


I am going to share with you a few of the pages from this book.  (Please note: my photos do not show the real beauty of each page.)


Charles Tunnicliffe had a wonderful talent. 


"In 1944, he was elected to the Royal Academy."


"In August 1974 an exhibition of his bird drawings opened at the Royal Academy."


He was awarded the Gold Medal of the Royal Society for the protection of Birds in 1974.


"Charles Tunnicliffe achieved distinction in several fields: as an etcher and engraver, water colorist, and book illustrator specializing in natural history subjects."


He died in 1979.


I am mesmerized by his sketches.  I do not think I can use any of the prints from this book to mat and frame.  I think it will make a beautiful coffee table book in my living room or in my upstairs landing room.  


Have any of you found prints in books and had them matted and framed either by a company or on a DIY project?


Please sign up and follow me in my adventures.  I wish each of you a wonderful week!

Wanda

Thursday, July 7, 2011

DIY Project for an Estate Sale Dresser

I told you Mr C and I found several things to go in Tom's House during an estate sale.  Well, we found a perfect dresser with a mirror to use in his house.  It will be used in his entry.

Here is the picture of the dresser being used as a sofa table.


I am going to change out the hardware.  Tom likes the color and the  storage the dresser offers.

Now my pride and joy purchase is the wire basket on top of the dresser.  This baby came from Goodwill at a great price of $3.99.


The moss spheres were made by yours truly.

I had all items needed to make the moss spheres.

and

plus I had the hot glue gun and hot glue gun sticks. 

I know many of you would have used pins to attached the moss, however 


Jack loves to have at least a small taste of everything.  He has devoured a chair seat!

So, I used hot glue instead of pins to attached the moss.

Watch out for the Summer heat!

 I love your comments and would love to have you follow me!

Wanda


Sunday, May 22, 2011

Bedside Tables from Bookcases

Last month, Mr C and I went to an estate sale and found several great items that would work in our son's house.  As you know, I have been working on Tom's bedroom.  We found two bookcases and the tops could be removed. The lower part of the bookcases are the perfect height for bedside tables.  Here is a "before" photo of the bedside tables and their tops.


Mr C and I love the design on the drawers.


So, I went to work on the bedside tables.  I did the usual sanding, priming, and painting two coats of base paint on the body and the drawers of the tables.  I used a walnut stain on the top of the tables.
Then, I proceeded to distress the drawers with the electric sander and with "Old School" hand sanding.  I added glaze and finished with a semi-gloss polycrylic top coat on the body and the drawers and a satin finish of  polyurethane on the top of the bedside tables.  I sprayed "ORB" on the hardware.

Here is peak.


Another close look.


A final close up look.


Now a look at one of the finished tables.


After noticing how several people in blog land uses drop cloths for curtains, I thought, what a great price for a great look! So, I used drop cloths for curtains in Tom's bedroom. I bleached, washed, and ironed the drop cloths.  I spayed painted the existing curtain hardware with "ORB".  I purchased curtain clip rings from Lowes. Mr C hung the hardware at the top of the ceiling. I love the look of curtains hanging from the ceiling.  I think it adds great eye design to a room.

I found lamps for the bedside tables at the Homegoods Store in Dallas.  Do I Love and I mean LOVE the Homegoods Store? (wish OKC would get one)  Great price for the lamps.  In fact, while I was in the checkout line, I was wondering if Tom would like the lamps. A young man Tom's age asked the price of the lamps and said he like them.  Hoo Woo!! (The young man made my day by easing my doubts.)


Without further delay, here is a full look of  the bedside tables.


A look at the table on the other side of the bed.

The photos do not show the true color of the tables.
Now, a look at the whole bed side of the room.

What do you think of the room, so far?

I have some more ideas for the bedroom. There is a corner that needs two chairs and a small table. (I have to paint the table. It is sitting in the garage) Also, more accessories are needed for this room.  I have been searching different blogs for wall covering ideas! You, Bloggers are so talented!

I love your comments!  Please share your thoughts with me:) I look forward to having you follow me on my journey!

Have a great week!

Wanda


Monday, May 16, 2011

Goodwill Treasure Update #1

Hi Everyone! 


I have been quite busy in the last weeks.  I went down to First Monday weekend in Canton, Texas with two of my friends.  On the way to Canton, we stopped and shopped at the Home Good Store in Dallas, where I purchased two lamps for my oldest son's bedroom.  I will share these with you very soon.  On Saturday morning, we went to "Trade Days" in Canton.  We saw lots of neat things.  

I purchased four big pots of Petunias for $5.00 each, large "Bumble Bees" tacks and a couple of clothing items.  My friends found things they loved, too.


After my shopping weekend, I came down with a horrible sinus infection, which held me back for almost 10 days. I had to go to the doctor for meds, and I am quite well now.


Today, I want to share one of my Goodwill treasures that I purchased several weeks ago.  Do you remember this photo of my treasure hunting find from Goodwill?


Well, I spray painted the pole lamp "Oil Rubbed Bronze" and covered the shade with burlap and jute.


I saw the burlap lampshade with jute idea on a blog.  I cannot find the blog, however, there is blogger out there, who had this idea first and shared.  I would give credit, if I could locate that blog again. 


Here is the result.


Not bad for $9.95 for the pole lamp from Goodwill.  I already had the spray paint, burlap, and jute.

I know it is a busy time for most families with the end of  the school year nearing.


Wishing each of you a Wonderful Week!  Love to hear your comments.


Wanda


Tuesday, April 26, 2011

DIY Accessories Color Change

The other weekend, Mr C and I went shopping at Yard Sales and Estate Sales.

We picked up two small metal decor accessories for $2.00.


These colors were not going to work at my house or my son's house.


So I spray painted, glazed, used Rub 'n Buff, and sprayed a light coat of polyurethane on both accessories.


Here are the results.


I am thinking they can be displayed at Tom's House.  


Also, while shopping, we found a dresser with a mirror, two book cases with removable top shelves, and a couple of more smaller accessories.  I am working on these other items and hope to share with you very soon!


Have a great Week!  Love your comments!  Thank you!


Wanda